Installation
1. Create a Discord Application
Section titled “1. Create a Discord Application”To create a bot application, refer to this Discord.py guide. Once your application is set up, return here to continue.
2. Configure config.json
Section titled “2. Configure config.json”The config.json file contains all global configuration options for your bot. Below is a sample default configuration:
{ "token": "", "clientId": "", "guildId": "", "logger": { "enable_debug": false }, "storage": { "enabled": false, "mongodb": "mongodb://localhost/database" }}Fill in each value for the bot to function correctly.
Your bot’s token is required to connect to the Discord API and appear online. Obtain your token from the Discord developer portal and enter it here. For details, see step 7 in the Discord.py guide.
ClientId
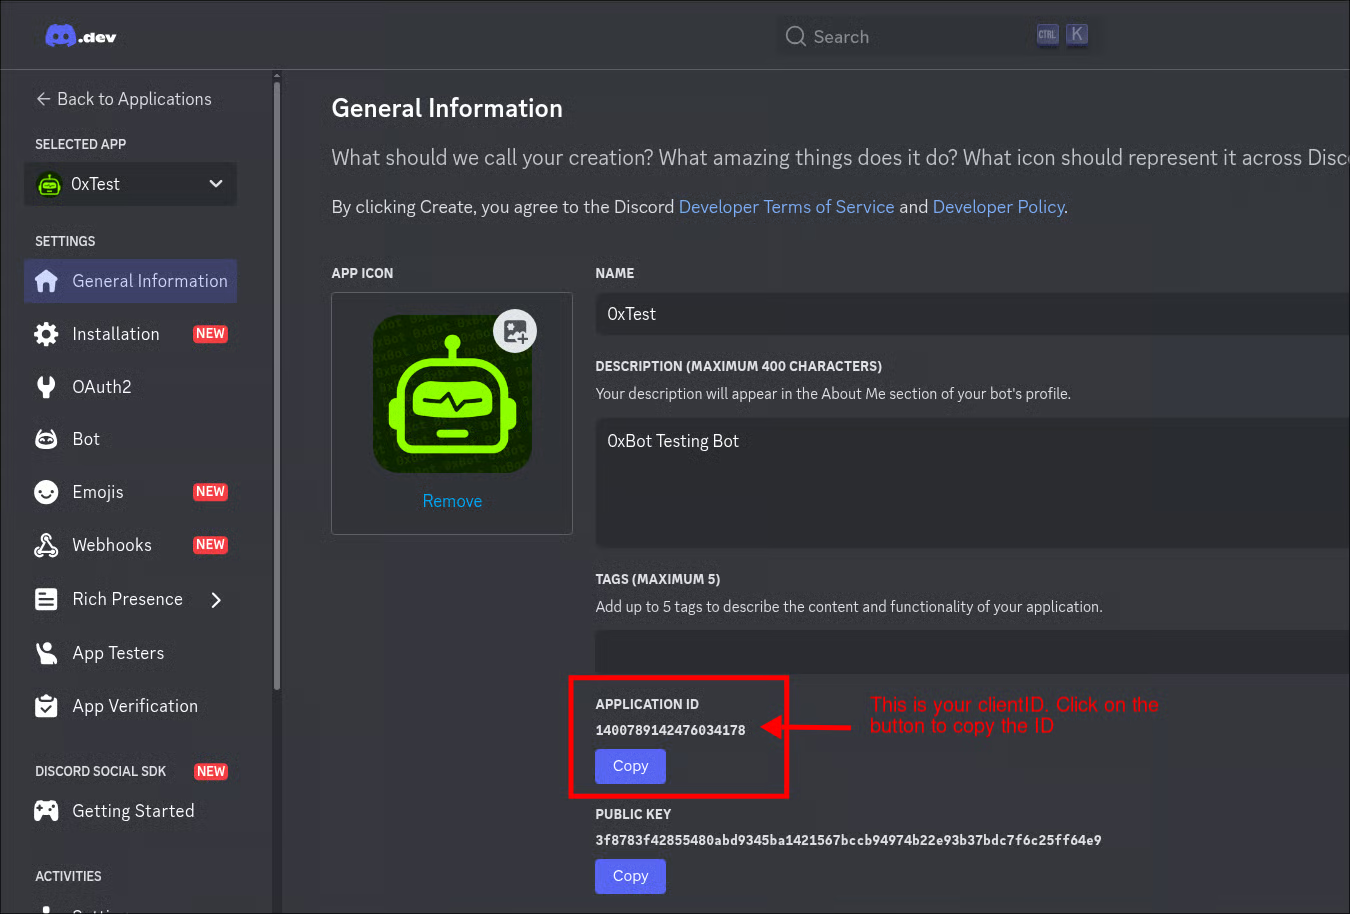
Section titled “ClientId”This is your bot’s application ID. Find it in Discord Developer Portal > [Your Application] > General Information > APPLICATION ID.
GuildId
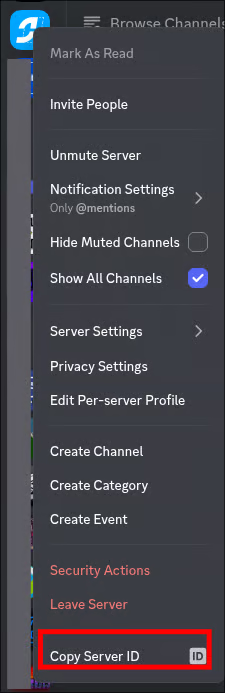
Section titled “GuildId”This is the Server ID where your bot will operate. To get it, enable Developer Mode in Discord, then right-click your server icon and select Copy Server ID. Learn how to enable Developer Mode in this guide.
3. Start Your Bot
Section titled “3. Start Your Bot”After configuring your bot, ensure you have the following requirements:
- Node.js
- NPM
- A server (Linux, macOS, or Windows)
1. Install Node.js and NPM
Section titled “1. Install Node.js and NPM”Node.js runs your bot, and NPM manages dependencies. If not installed, follow this guide.
2. Install Dependencies
Section titled “2. Install Dependencies”Open a terminal in your bot’s root folder and run:
npm installThis command installs all required dependencies.
3. Run the Bot
Section titled “3. Run the Bot”Start your Discord bot with:
node index.jsAfter a few seconds, your bot should appear online in your Discord server.